Ground Plane Calibration
What is ground plane calibration?
Ground plane calibration sets the 3D world so that “up” (the Z axis) means up and the ground is where it should be. Instead of using a camera’s perspective to define the world (which can lead to the 3D data coming on oriented oddly), it uses a flat ChArUco board placed on the floor to set the origin and upright orientation. This helps the triangulated data come in with the subject’s feet on the ground and their body standing tall - as opposed to having to rotate the subject onto the floor in post-processing. Below is an example of the output 3d data that was reconstructed using the ground plane calibration feature - with no additional rotations applied.
Quick Overview: How do I record a ground plane calibration?
Overall, the process is relatively similar to how you record our default calibration! There are two key differences:
You'll check a specific box in the GUI before recording your calibration or processing your calibration specifying you want to set the board as your ground plane
When recording a calibration video, you must start the recording with the board on the ground, un-obscured and visible to all cameras for a few seconds
And that's the short-and-sweet version! Detailed instructions follow below.
How to use ground plane calibration
1. In the software, check the Use Charuco board as groundplane option
A. If recording your calibration through the FreeMoCap software:
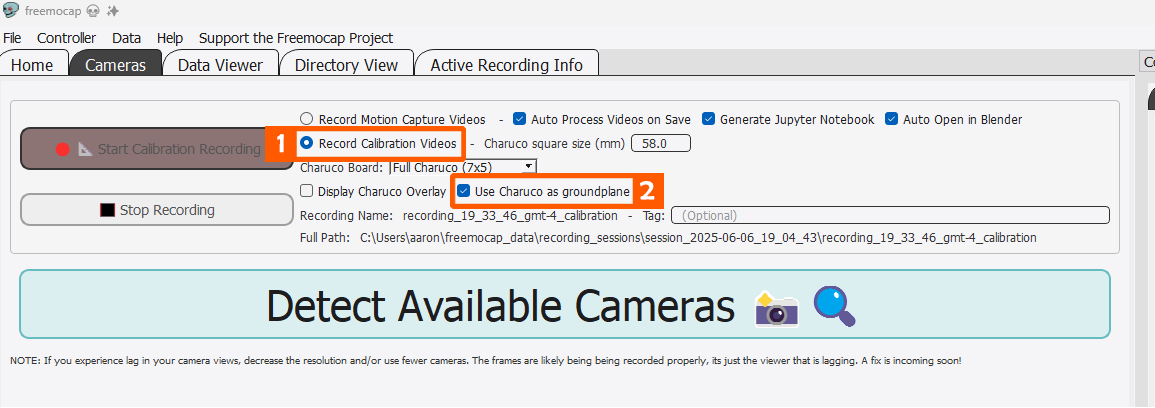
Choose the
Record Calibration Videosoption. Set all other parameters (e.g. square size) as normalCheck the
Use Charuco as groundplanecheckbox and then proceed with recording your calibration according to the instructions above
B. If processing an external calibration recording/reprocessing an existing calibration recording:
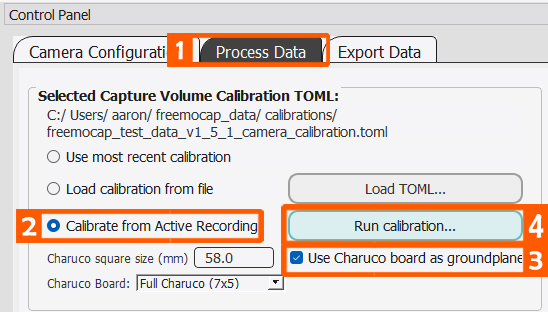
Go to the
Process Datatab under theControl PanelChoose
Calibrate from Active RecordingCheck the
Use Charuco as groundplanecheckboxPress
Run Calibration
2. Recording Calibration Videos to use with Ground Plane
Start your calibration recording with the board flat on the ground.
At the start of your calibration - have your ChArUco board flat on the ground, making sure it is visible to all cameras Leave it on the ground for a few seconds, and then proceed with calibration as normal. Here's an example below.
3. Processing Your Ground Plane Calibration
After recording your calibration videos through the software, or pressing the Run Calibration button, your calibration will begin to process as normal with one extra step. After running through the normal intrinsics/extrinsics calculation, FreeMoCap will attempt to set the ground plane to be the ChArUco board
The software will search the first 120 frames of your recording for a frame where the ChArUco board satisfies two conditions:
The 3 corners of interest needed to build the axes are visible
The board is stationary
If a suitable frame is found, the board will be used to build a new set of 3D axes, explained below.
How ground plane calibration works
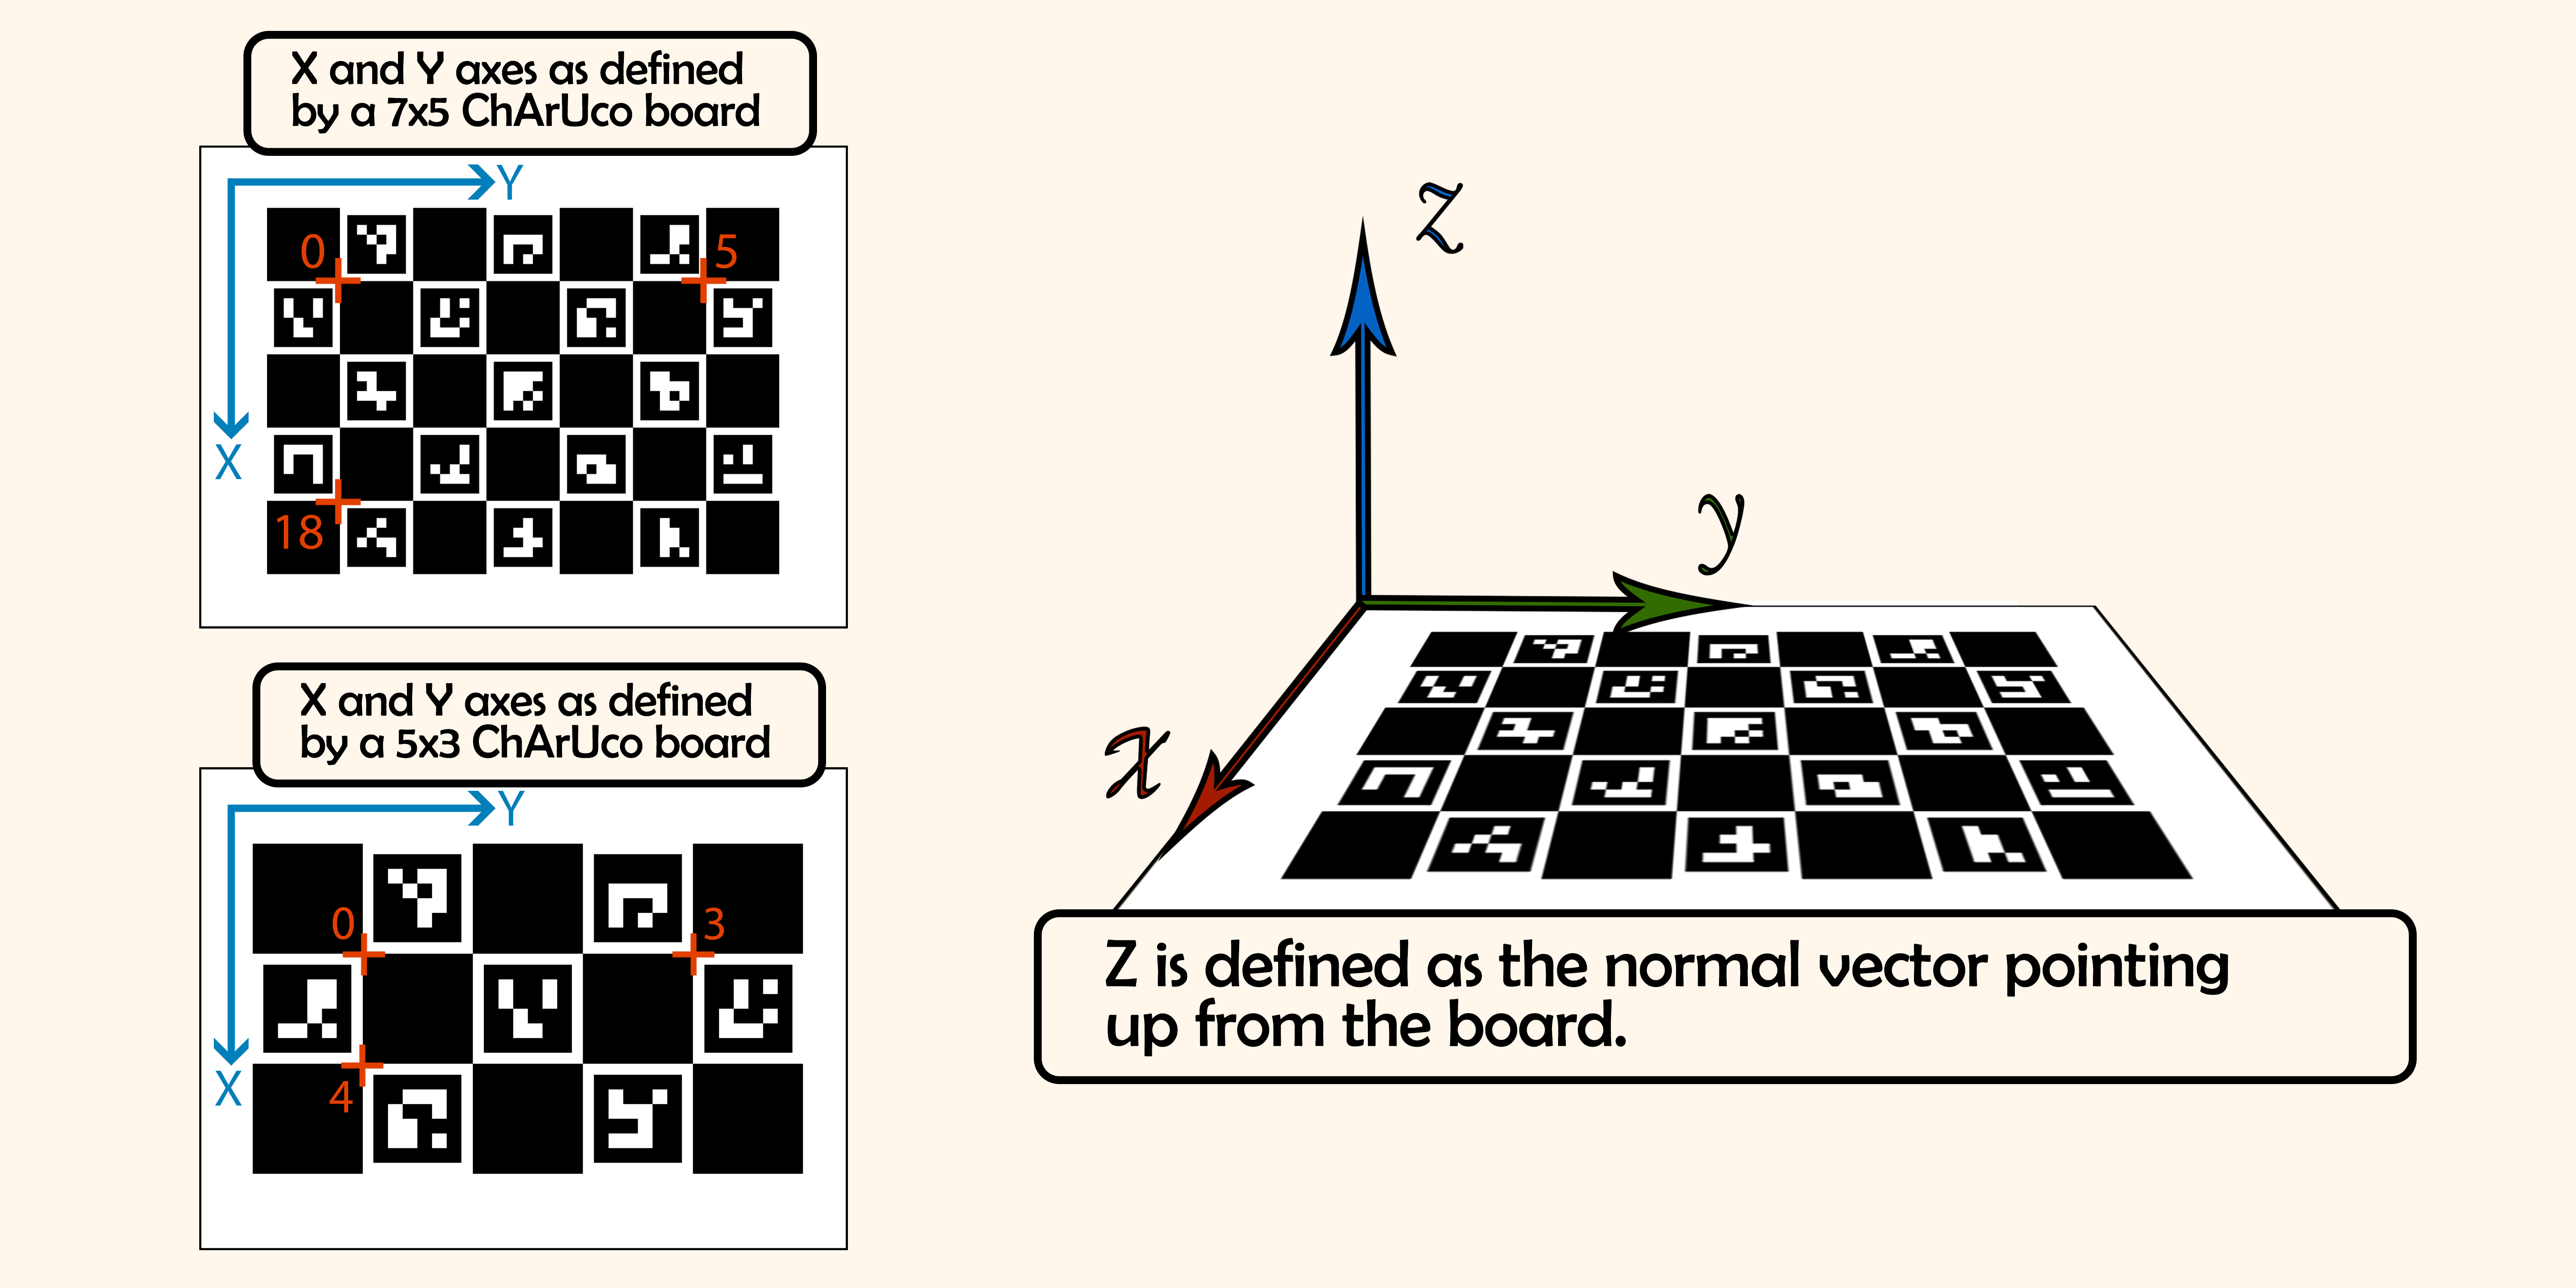
Ground plane calibration redefines the world coordinate system using the orientation of the ChArUco board.
The origin
(0, 0, 0)is set to corner 0 of the ChArUco board (the location of marker 0 on a 7x5 and 5x3 board is shown in the figure below)The X and Y axes are defined by the furthest markers from the origin along the edges of the board
For a 7x5 board, X is defined as marker 0 to marker 18 and Y is marker 0 to marker 5
For a 5x3 board, X is defined as marker 0 to marker 3 and Y is marker 0 to marker 4
The Z axis is computed as the normal vector pointing up from the board surface (using the right-hand rule)
4. Ground plane calibration results
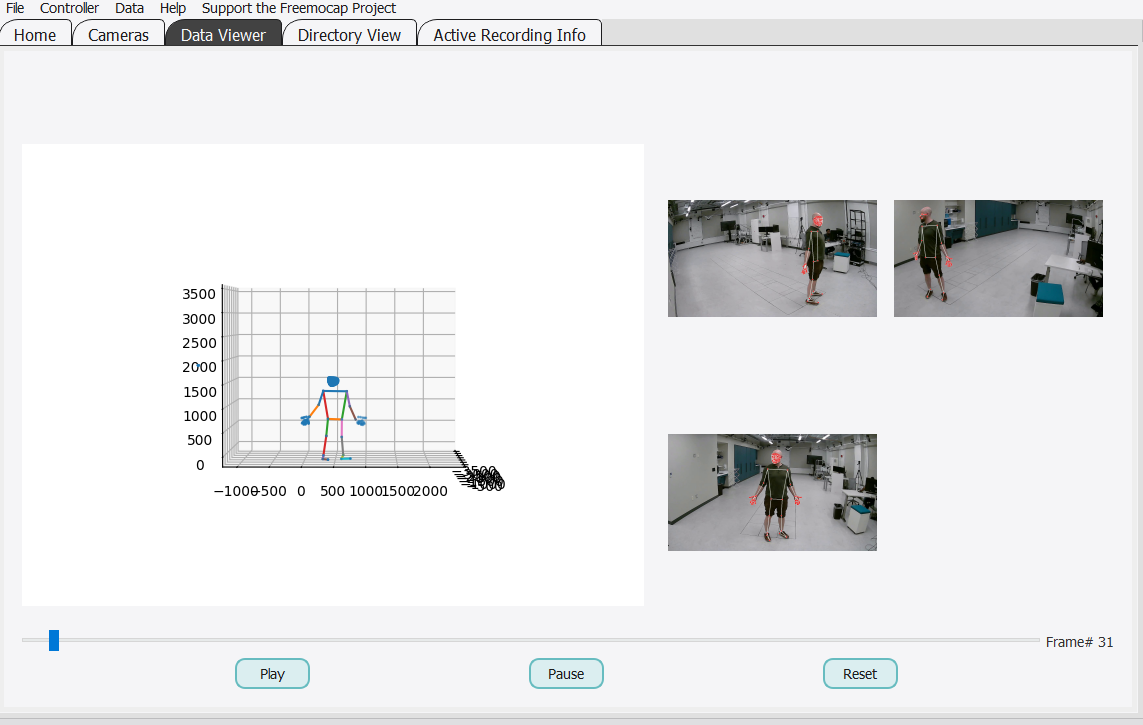
With a successful ground plane calibration, the origin of the world will be set to marker 0 of the ChArUco board, and the subject will come in standing upright in the +Z direction, with their feet at Z=0. This will be most evident in looking at the data viewer in the FreeMoCap GUI - as you can see in the example below.
Possible Errors
If the ground plane calibration fails, the software will instead use the default calibration. If ground plane calibration fails, there should be a pop-up window letting you know and giving you a reason why. There are a couple of known reasons this may happen.
1. CharucoVisibilityError
This error is raised when the software is unable to find a frame where all 3 corners needed to build the axes are visible. In this case, the ChArUco board may be too far from the cameras when on the ground to get a good track - consider whether you can adjust your camera setup or your board placement to make it more visible to all the cameras
2. CharucoVelocityError
This error is raised when the velocity of the board is generally too high in all found frames to be considered stationary. Double-check and make sure the board was completely flat and still for the first few seconds of the recording. This error may also pop up if, as with the CharucoVisibilityError, the board was too far away from the cameras to get a good track of it.
How is ground plane calibration different from default calibration?
By default, the world coordinate system is defined by the location and orientation of Camera 0 — which tends to be the camera that took the first video in the synchronized_videos folder. This means:
The origin
(0, 0, 0)is placed at the optical center of Camera 0The world axes align with Camera 0’s coordinate frame: +Z points outward from the lens, +X to the right, and +Y downward in the image
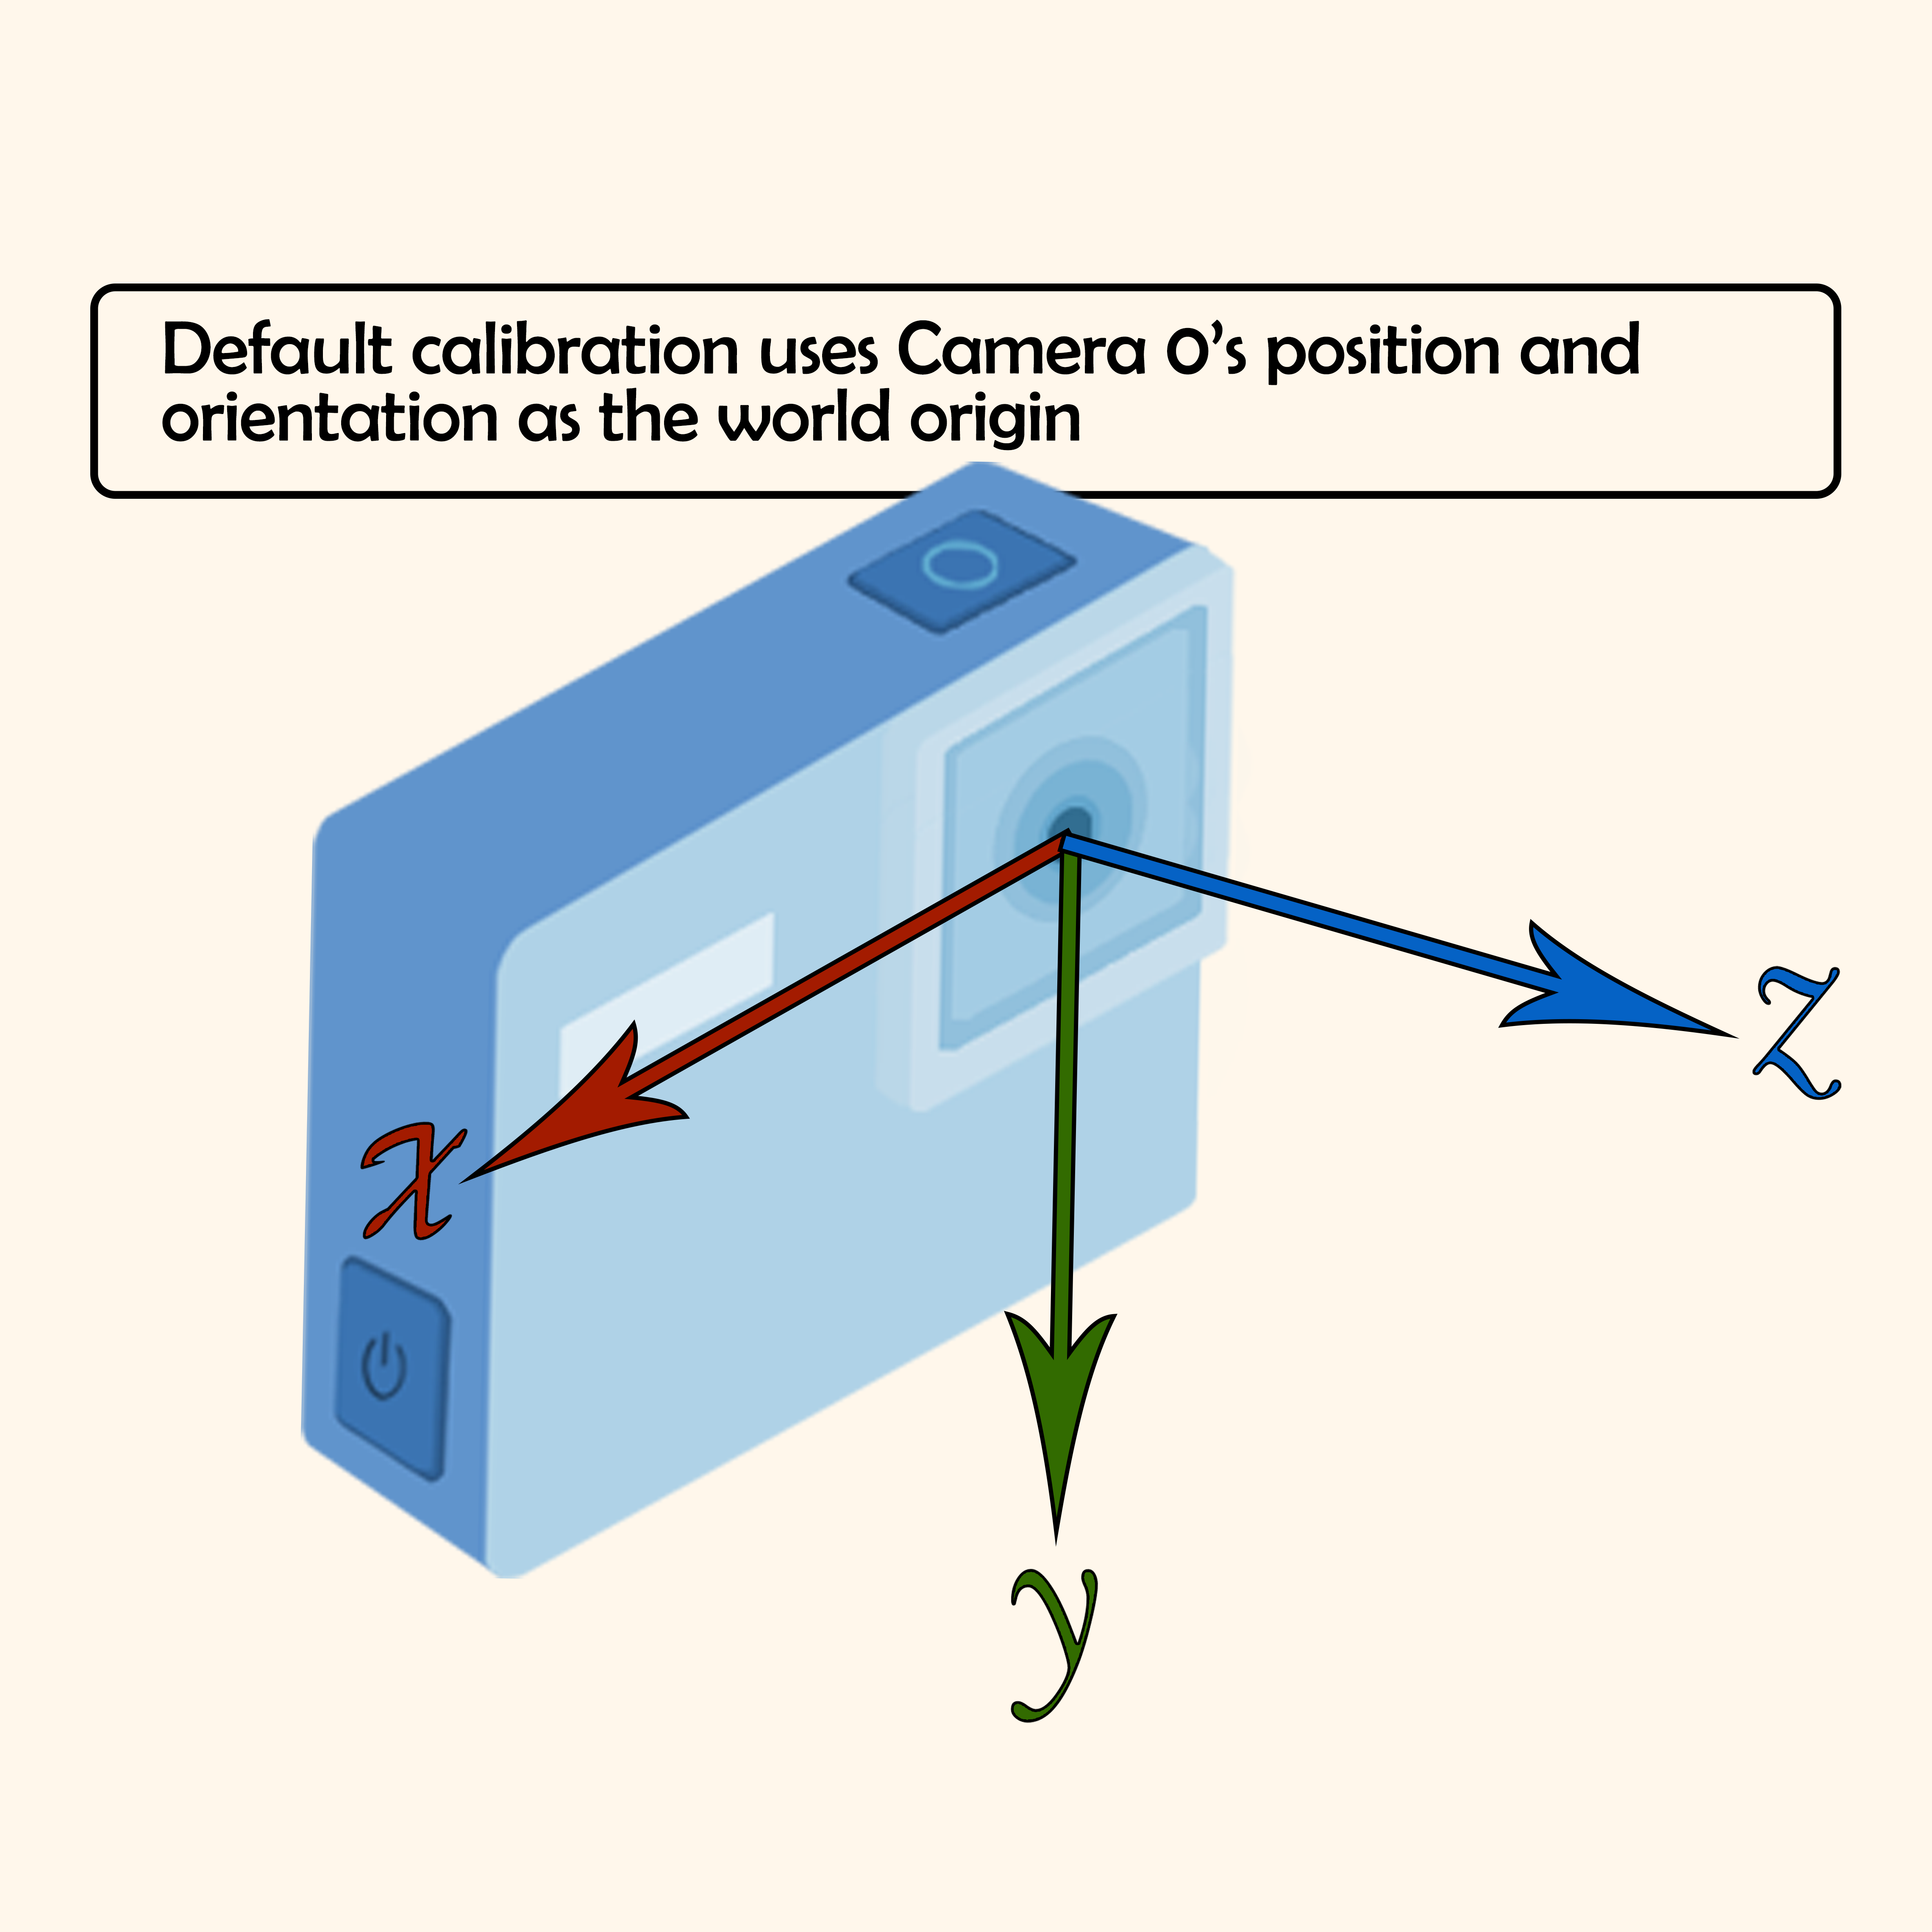
As a result, reconstructed 3D data (e.g. skeletons) often comes in aligned to the camera's perspective rather than to the physical environment — which means subjects may come in lying sideways instead of standing upright (see image below for an example).
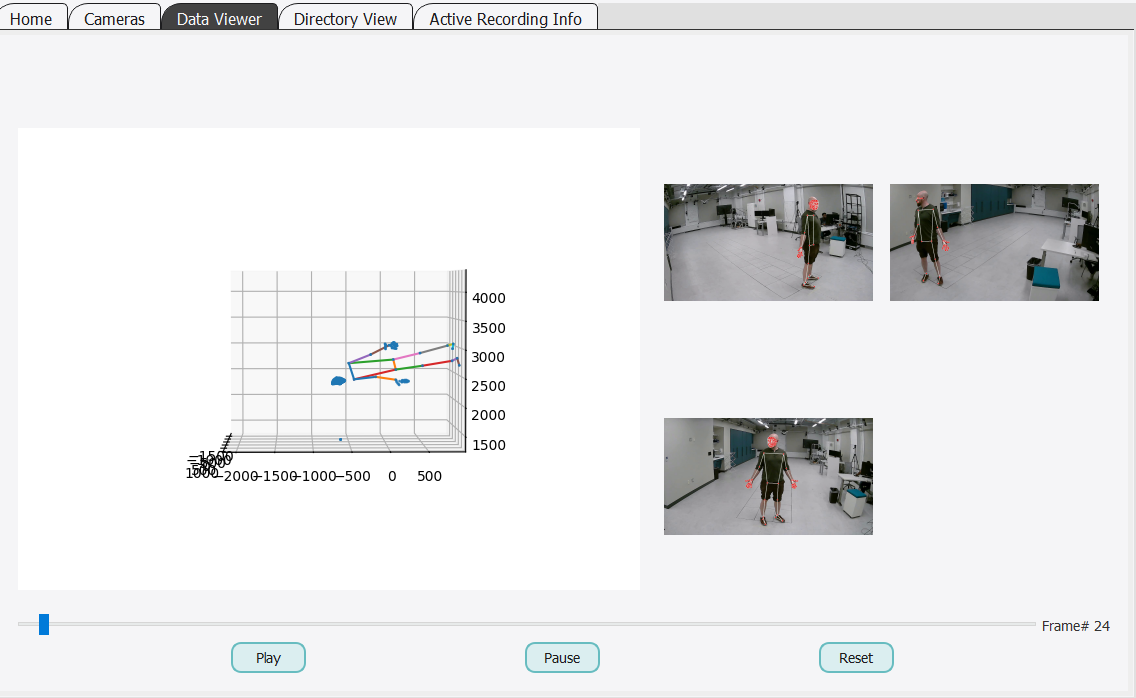
While we rotate the reconstructed 3D data to make it appear upright and place the feet on the ground before exporting to Blender, it’s far more reliable to ensure the data is aligned correctly from the start.